



Voronoi flame ornament, a bold eerie Christmas piece
A two-size STL and 3MF file set for printable tree decor
 Leon Founder & Lead Designer
Founder and lead designer, focused on new concepts, 3D design and developing our digital tools.
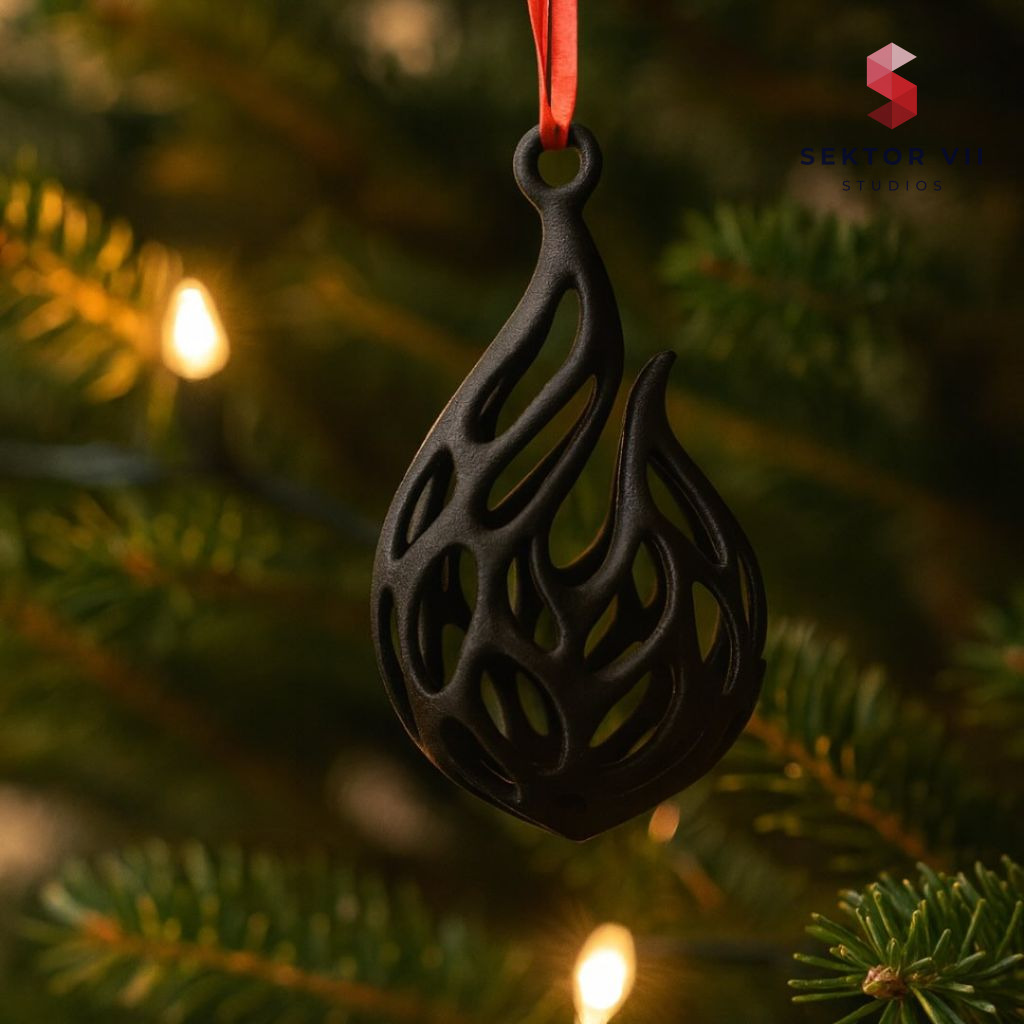 A real photo of our own print, shot in our white light box. The clean white background is real studio lighting, not a render - we print every model ourselves.We print every model ourselves. This render shows the original model exactly as it comes off the printer - only digitally staged.
Contents
Hey print people. Today we are giving the Voronoi flame ornament a little more attention and taking a closer look at the concept, the geometry, and the final result.
A voronoi flame ornament takes the familiar teardrop shape of a Christmas bauble and reworks it into an open lattice that moves like fire caught mid-flicker.
The idea is simple: instead of a solid shiny ball, you get a structure that lets light pass through the gaps and throw shadows across whatever it hangs near. On a tree, pinned to a branch, or hung on its own near a window, it behaves differently depending on what’s behind it and what light hits it.
What does the flame shape do on a tree?
Because the voronoi pattern is irregular rather than a repeating grid, each piece catches light a little differently depending on how it’s turned. Hung among string lights or near a window, the gaps in the lattice throw small shadows that shift as the light source moves or flickers. It reads as warm rather than sharp, which fits a holiday piece better than a geometric pattern with hard edges would.
The flame silhouette itself is the other half of the idea. It’s not a literal flame with curling tips, more a tapered, dynamic shape that suggests movement without trying to be realistic. That restraint is probably why it works in a minimalist setup as easily as on a fully decorated tree.
Voronoi flame ornament in two sizes
Both sizes ship together, which means you’re not stuck guessing whether one scale will look right once it’s actually hanging. Mixing the two across a tree, a garland, or a cluster of branches gives some depth instead of a flat row of identical shapes. If you’re planning a themed set rather than a single ornament, printing a batch of both sizes side by side is the straightforward way to fill out a tree without every piece looking the same.
The loop for hanging is already part of the model, so there’s no separate hook or ring to source. You print it, thread a ribbon or thin cord through, and it’s ready.
How does filament choice change the look?
This is where the ornament changes character the most. A matte black filament gives it a quiet, almost silhouette-like presence, good for a modern or monochrome tree where you don’t want much glare. Silk filament goes the opposite direction: it picks up more shine and reads as more festive, closer to what people expect from a traditional ornament finish. Translucent filament is mentioned as a third option for a glowing effect, which makes sense given how open the lattice structure is; light would pass through the body itself rather than just through the gaps between struts.
None of these are called out as better than the others; it really comes down to whether you want the ornament to recede into the tree or stand out against it.
Printing notes worth knowing before you start
The surface is designed to print cleanly on any FDM printer, and a smooth finish is specifically recommended, which lines up with the matte or silk filament suggestion. It’s a shape that benefits from supports given the open lattice geometry, so budget a little extra time for cleanup once it’s off the plate. Beyond that, the geometry itself does the work. There isn’t a lot of fine detail to lose if your printer isn’t dialed in perfectly, which makes it a reasonable print to hand to a printer you’re not fully confident in yet.
If you’re already printing other pieces from the Christmas Collection, this one slots in as the piece that adds motion and light play to a shelf full of more static shapes. It doesn’t need a stand or base, just a spot where it can hang and catch whatever light is nearby, whether that’s a tree, a window ledge, or a mantel display.
The design talk ends here, but the printing part is just getting started. Have fun with the Voronoi flame ornament, try your own colors and materials, and we will meet again in the next studio log.
Leon Sektor 7 Studios
Get this model
Every model is available as STL and 3MF files. Selling physical prints needs a commercial license; the files themselves may not be resold. Part of our library of 400+ models – every one included from $10 a month.
On social media
Commercial license
Recommended Print Settings
The settings and the filament we used for our own print of this model, and the combination that gave us the best result. A recommendation, not a requirement.
- Filament
- Bambulab PLA Matte black
- Infill
- 8% Gyroid or Grid
- Layer Height
- 0.2mm
- Walls
- 2
- Nozzle Size
- 0.4mm
- Support Structure
- needed
- Brim
- None needed, but when you have adhesion problems then activate the brim
- Skirt Loops
- 1
Fuzzy Skin optional
A slicer setting that adds tiny random jitter to the outer walls, so the surface feels textured instead of smooth. It hides layer lines and seams and adds grip. Point distance sets how far apart the jitter points sit along the wall (smaller means finer), thickness sets how far each one moves (higher means rougher).
- Applies To
- Contour
- Point Distance
- 0.30 mm
- Thickness
- 0.10 mm
Not required — we used it on our own print. The 3MF project file already has it set up.
Tags
Join the conversation
Loading comments…